The process can seem daunting when migrating your WordPress site from one host to another. However, it can be executed seamlessly with zero downtime if done right. Before we delve into the step-by-step guide, it’s worth noting that many WordPress hosting providers offer free migration services for your site if you opt for their hosting plans. So, don’t hesitate to inquire about this feature.
Step 1: Choose Your New Host
The decision to migrate your site isn’t made lightly. There must be a specific reason motivating your switch. Therefore, clarifying what your potential hosting company can offer you is imperative.
Step 2: Create a New Site in the New Destination
After subscribing to your new host, you must create a new site. Hosting companies have varying panels and steps for creating a new WordPress site. If you’re unsure or encounter difficulties, your hosting provider will be more than willing to assist. Alternatively, you can refer to this guide on creating a site with cPanel, as most hosting companies integrate this control panel.
Step 3: Backup Your Current Site
Now, it’s time to turn our attention back to your current site. Start by backing up your site to safeguard against any potential issues. A highly recommended tool for this purpose is Updraft Plus.
Step 4: Disable Cache and Security Plugins
Cache and security plugins can interfere with site migration. Ensure you turn them off before proceeding to the next step.
Step 5: Install a Migration Plugin

On your old site, install the “Migrate Guru” plugin.
After installation and activation, head to the plugin’s interface, input your email, and click “Migrate Site”.
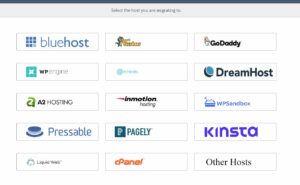
Select the host you’re migrating to and follow the specific guide provided. If your host isn’t listed, but they have a cPanel, choose cPanel. If they don’t, choose “Other Hosts”.
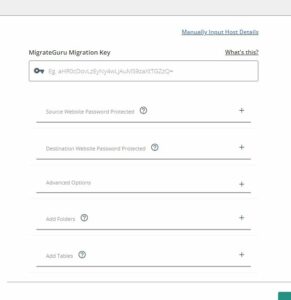
In the case of “Other Hosts”, you’ll need the MigrateGuru Migration Key.
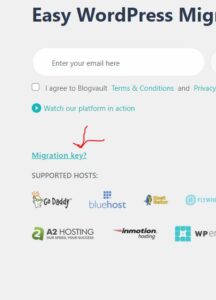
To get this, go to your new site, install the Migrate Guru plugin, and click “Migration Key?” on the settings page to copy the key. Return to the old site, paste the key, and click “Migrate”. The migration process duration will depend on your website’s size.
Step 6: Update Domain Name Servers (DNS)
Once the migration is complete, you must update your domain DNS to the new host. For illustrative purposes, let’s use NameCheap as an example (other providers have similar procedures). Log in to your domain provider (Namecheap, in this case), navigate to the dashboard, select the domain you wish to update and choose “manage”. Select your new host’s DNS under the “Nameservers” section. If you’re unsure about this, ask your host. Now, wait for the propagation time to complete the DNS pointing and update.
Bonus Point: Maintenance Mode
If your site involves a lot of transactions or user access, it’s advisable to set up maintenance mode for the site and log out all users. While technically, this can be considered “downtime”, it helps to prevent missing User Generated Content (UGC) and other conflicts.
Migration can be complex, but with these steps, you can efficiently move your WordPress site from one host to another with minimal disruptions. The key is to take your time, keep a backup, and communicate effectively with your hosting providers. This way, you can ensure a smooth transition that keeps your website running, avoiding traffic loss or potential business.
Remember, migration aims to improve your website’s performance and user experience. If you’re migrating for the first time, it might seem challenging, but it becomes easy once you get the hang of it. Also, remember that your hosting provider is there to help you navigate any bumps.
Finally, it’s important to remember that propagation of DNS changes can take up to 48 hours, so don’t be alarmed if your site doesn’t immediately appear on the new host. Just be patient; soon enough, your WordPress site will be fully operational on its new hosting platform, ready to serve your audience better.
Good luck with your migration journey! By following this guide, you’re well on your way to successfully moving your WordPress site without downtime.