When you’re making changes to your WordPress website or fixing some issues, the last thing you want is for your visitors to experience downtime or encounter a half-finished page. One of the best solutions is to put your site in maintenance mode, effectively communicating to your visitors that you’re actively improving their future browsing experience.
In this guide, we’ll walk you through a step-by-step process of how to put your WordPress site into maintenance mode using the Website Builder by SeedProd.
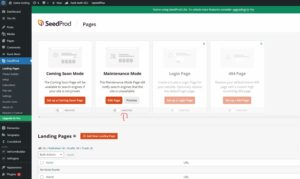
Step 1: Install the Maintenance Mode Plugin
The first step is to install the maintenance mode plugin. We’ll use the Website Builder by SeedProd for this guide, a reliable and user-friendly plugin. Navigate to the ‘Plugins’ section in your WordPress dashboard, search for ‘Website Builder by SeedProd’, and install and activate it.
Step 2: Set Up Maintenance Mode
After installing and activating the plugin, you’ll land on a Welcome Page. Click on the ‘Get Started’ button as shown in the screenshot below:

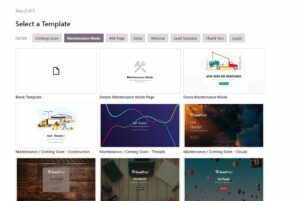
Next, click ‘Save and Continue’. You’ll be prompted to select a page for your maintenance mode. We’ll use the ‘Simple Maintenance Mode Page’ in this guide.
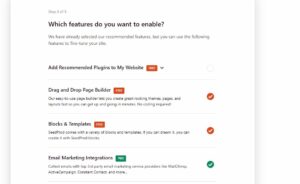
The next step will take you to a page where you can add recommended plugins to your website. However, you don’t need these now, so untick the box that says, ‘Add Recommended Plugins to My Website’. Click ‘Save and Continue’.
Finally, click ‘Finish Setup & Start Building Your Page’ to create your maintenance page.

Step 3: Design Your Maintenance Page
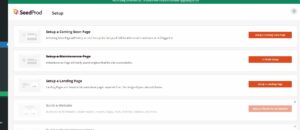
Now comes the fun part – designing your maintenance page. Click on the ‘Finish Setup’ button under the ‘Setup a Maintenance Page’ section:
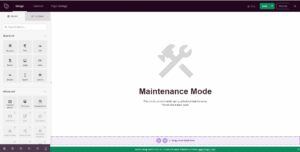
You’ll now be taken to the editor page where you can let your creativity shine. You can add a custom message for your visitors, include images, or even a countdown timer to when your website will be back up. Once you’re happy with the design, click the ‘Save’ button at the top right corner.
Step 4: Publish the Maintenance Page
After saving your design, click on ‘Page Settings’ located on the top left side of the page:

Select’ Publish’ in the Page Status section, then click ‘Save’ again. Click the close button at the top right, and you’ll be returned to the WordPress dashboard.
However, note that your maintenance mode is not activated yet. To do this, look for the Active/Inactive toggle button and switch it to ‘Active’. Your site is now in maintenance mode!
Step 5: Clear Cache & Logout all Users
If you have a cache system set up, it’s crucial to clear the cache at this stage. If you skip this step, your host might serve the non-maintenance mode interface to your visitors, which is confusing.
Furthermore, remember to log out all users. The reason is that logged-in users might still be able to visit the page without encountering the maintenance interface.
And voila! You’ve successfully put your WordPress site into maintenance mode. This process allows you to work on your site behind the scenes while providing friendly notice to your visitors. Happy tweaking!